This blog post is outdated
For new posts, see my medium blog.Achived Post

Why?
Why Streaming? One of the advantages of living in a big city, like London, is not just that you don’t have to own a car. It also makes it easier to find like minded people. People who are interested in learning the same thing you are and who are at a similar level in their learning experience on that topic, people you can form a study group with. I remember that working in, Stellenbosch, South Africa, I had to drive an hour and a half, one way, to Scarborough, Cape Town to find a group of about ten people interested in functional programming.
Why Pair programming? Pair programming on a Coq project, where I am still learning the language, libraries and underlying theory, has been more educational to me than I could have ever imagined. If I was to share something, the pair programming had to be part of it.
Why AWS? tl;dr more CPU! A friend from the study group and I started pair programming some Saturdays in coffee shops. This evolved into a video call, where it was easy to include a whole study group. Video calling in general is not CPU friendly and Zoom is no exception. If you are also running OBS (the streaming software), you have two programs both competing for 250% of your 400% CPU. At some point typing into the editor, felt like I was typing into a remote terminal over a dial up modem. AWS allows us to rent a beast of a machine which could handle all of this including Teamviewer at 25% CPU.
Quick, everyone who knows what Twitch is Google what a dial up modem is and everyone who knows what a dial up modem is, you may now Google what Twitch is.
Setup
I thought streaming pair programming was going to be easy. I thought it would be as easy as Ted’s setup for remote pair programming on twitch with zoom, all running on my local machine.
My laptop couldn’t handle it and this required me needing to rent an AWS Server, which in turn led to a longer than expected setup process. I almost gave up when I was 90% done and needed some encouragement from a friend to push me over the finish line.
- Setup Twitch
- Find an appropriate AWS machine
- Ask amazon to lift CPU limit
- Update security group to enable remote desktop
- Launch and log into server using Remote Desktop
- Update internet explorer security
- Install and setup Teamviewer
- Install virtual sound card
- Install and setup Zoom
- Install and setup OBS
- Install and setup IDE
- Remap keys
- Choose a method of collaboration
- Stream
Setup Twitch
Technically you can stream to Twitch or Youtube. I chose Twitch, since this is apparently more popular with coders.
Go to twitch.tv and create an account.
Now we want to setup Twitch to preserve you videos for later viewing, so viewers don’t always have to watch at the exact time that the stream is occurring.
- Go to you channel https://twitch.tv/awalterschulze
- Click on your profile in the top right corner and click on
Settings
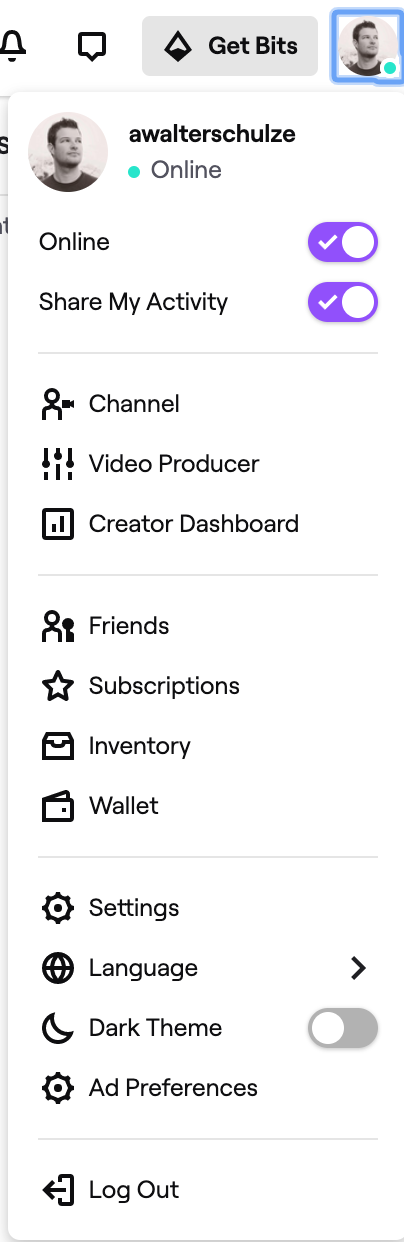
- Click on
Channel and Videos

- Enable
Store past broadcasts

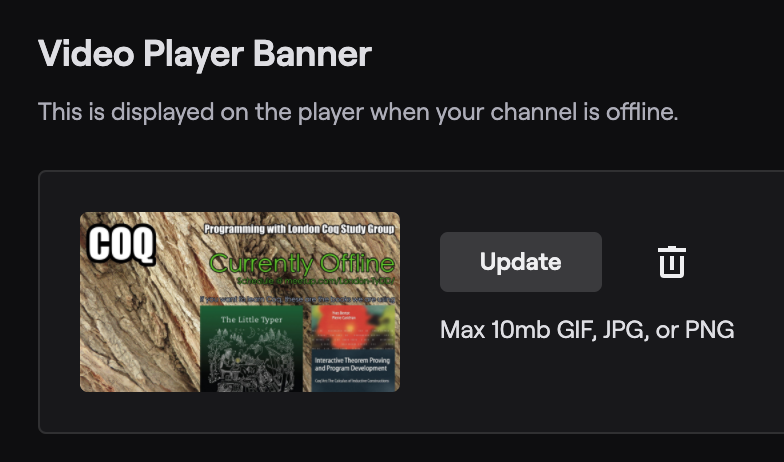
Next you need an image to display on your channel when you are offline.
Scroll down to Video Player Banner and click Update.
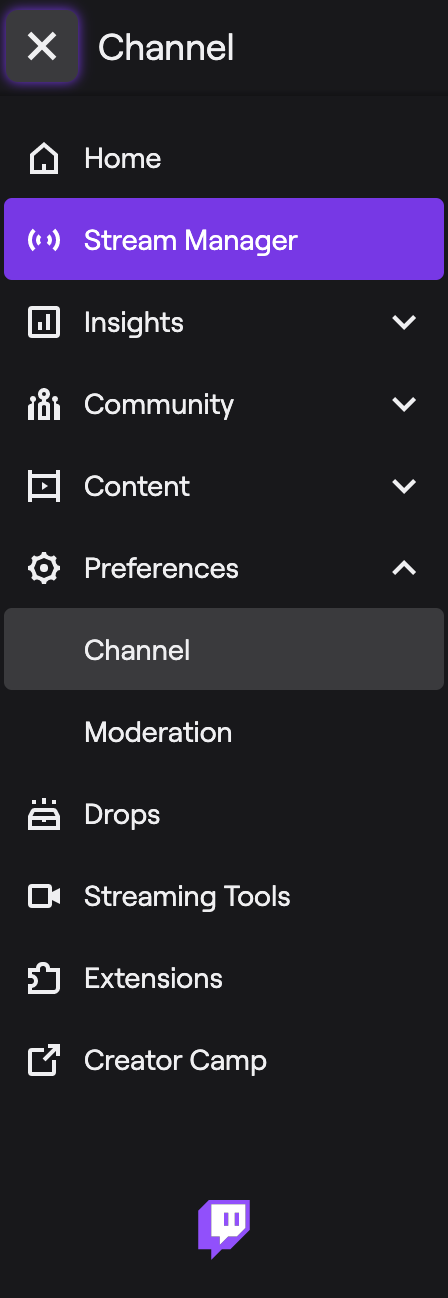
Next click on the hamburger on the top left and then click on Stream Manager.
Under Quick Actions click Edit Stream Info
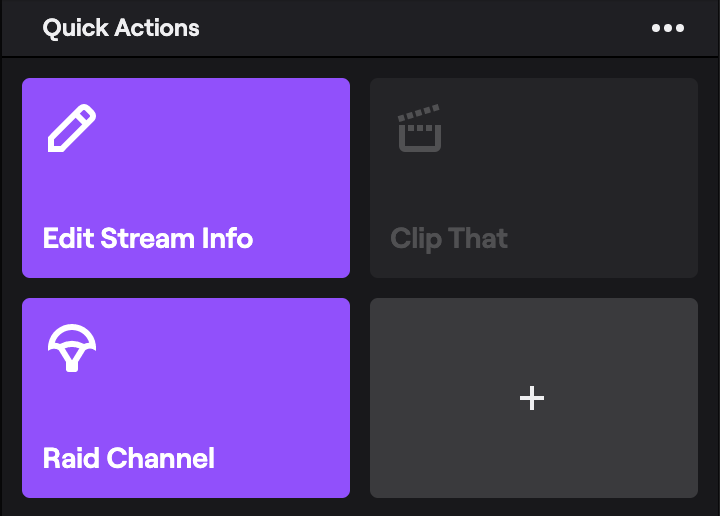
Finally set the Category as Science & Technology.
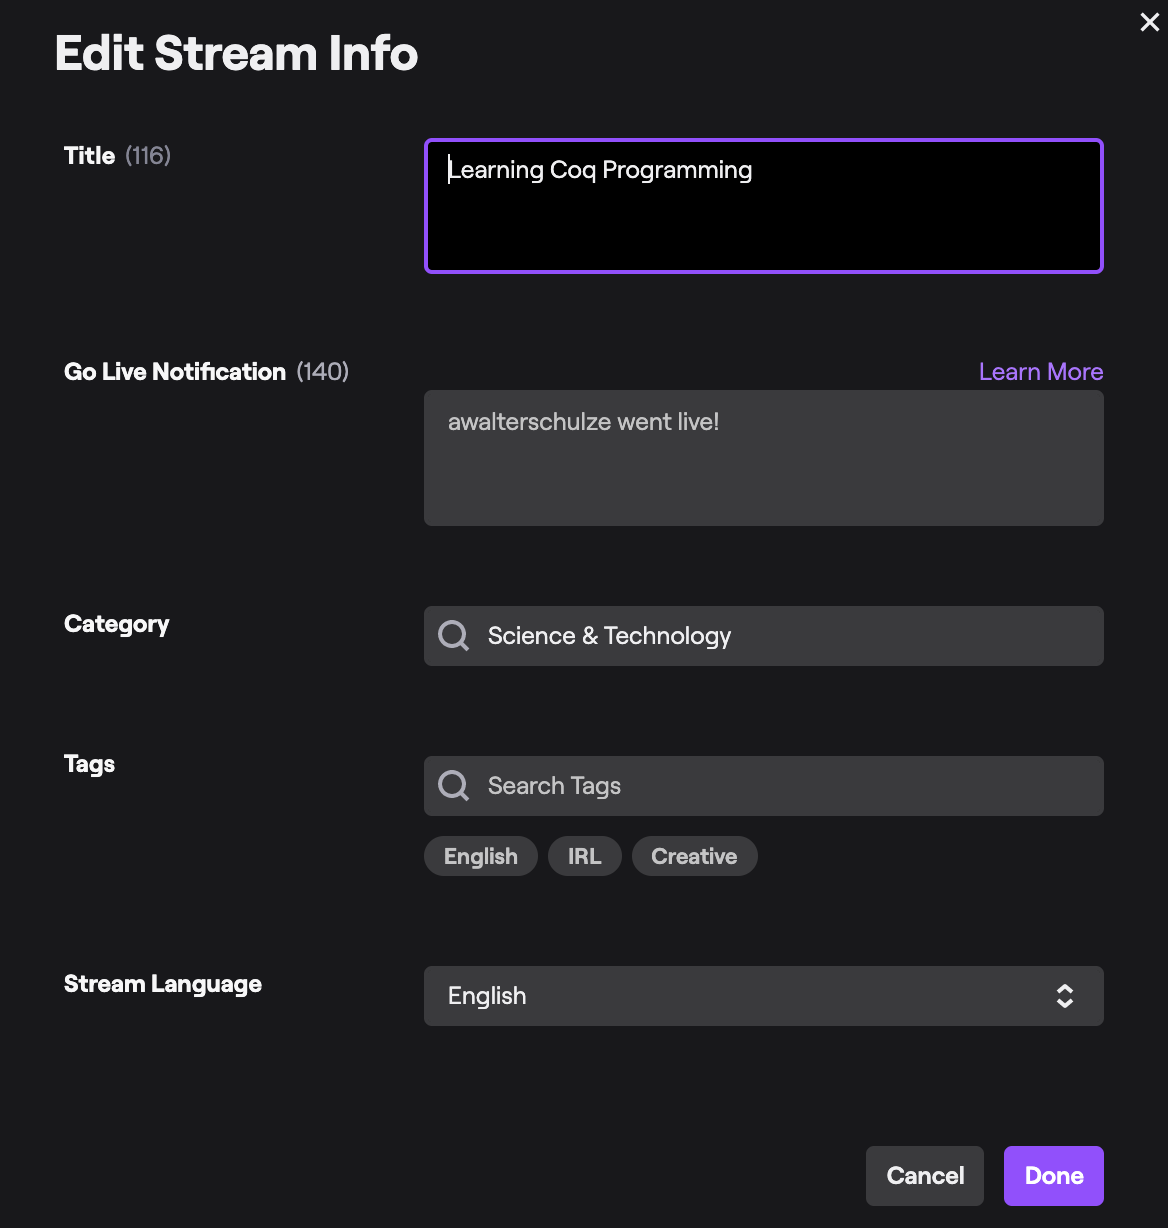
Unfortunately there is no coding category. Apparently there was one, but it has been shutdown and grouped into the Science & Technology category.
Find an appropriate AWS machine
We found the
Microsoft Windows Server 2016 with NVIDIA GRID Driver machine. It is a g3.4xlarge, which has 16 cores.
This setup with 16 cores ended up running at 25% CPU, so I wouldn’t recommend a 4 core machine. I chose windows over linux, because this is “the year of the linux desktop”. If you are new to AWS, you won’t be able to launch this yet and you will need to increase your CPU limit, see instructions in the next section.
This server looks expensive and it is not cheap, but given you are only paying for it when it is running, if you are disciplined in stopping the server, when you are not using it, it can be affordable, depending on how much you intend to use it. Now is a good time to make that calculation and decide whether you can live with the hourly rate, which is about $2 per hour, at the time of writing.
Ask Amazon to lift CPU Limit
- Create an AWS account or log into your existing one by going to your AWS Console
- At the top, click
Servicesand from the menu underComputeselect EC2 - On the side menu, click
Limits - Search for CPU and select
Running On-Demand All G instances, this is if you also chose a machine that starts withg, like theg3.4xlarge. If you are new to AWS, like me, you will need to increase yourCurrent Limitfrom0to16to be able to launch the chosen machine. I selected32, just in case. If your limit is already high enough you can skip this section.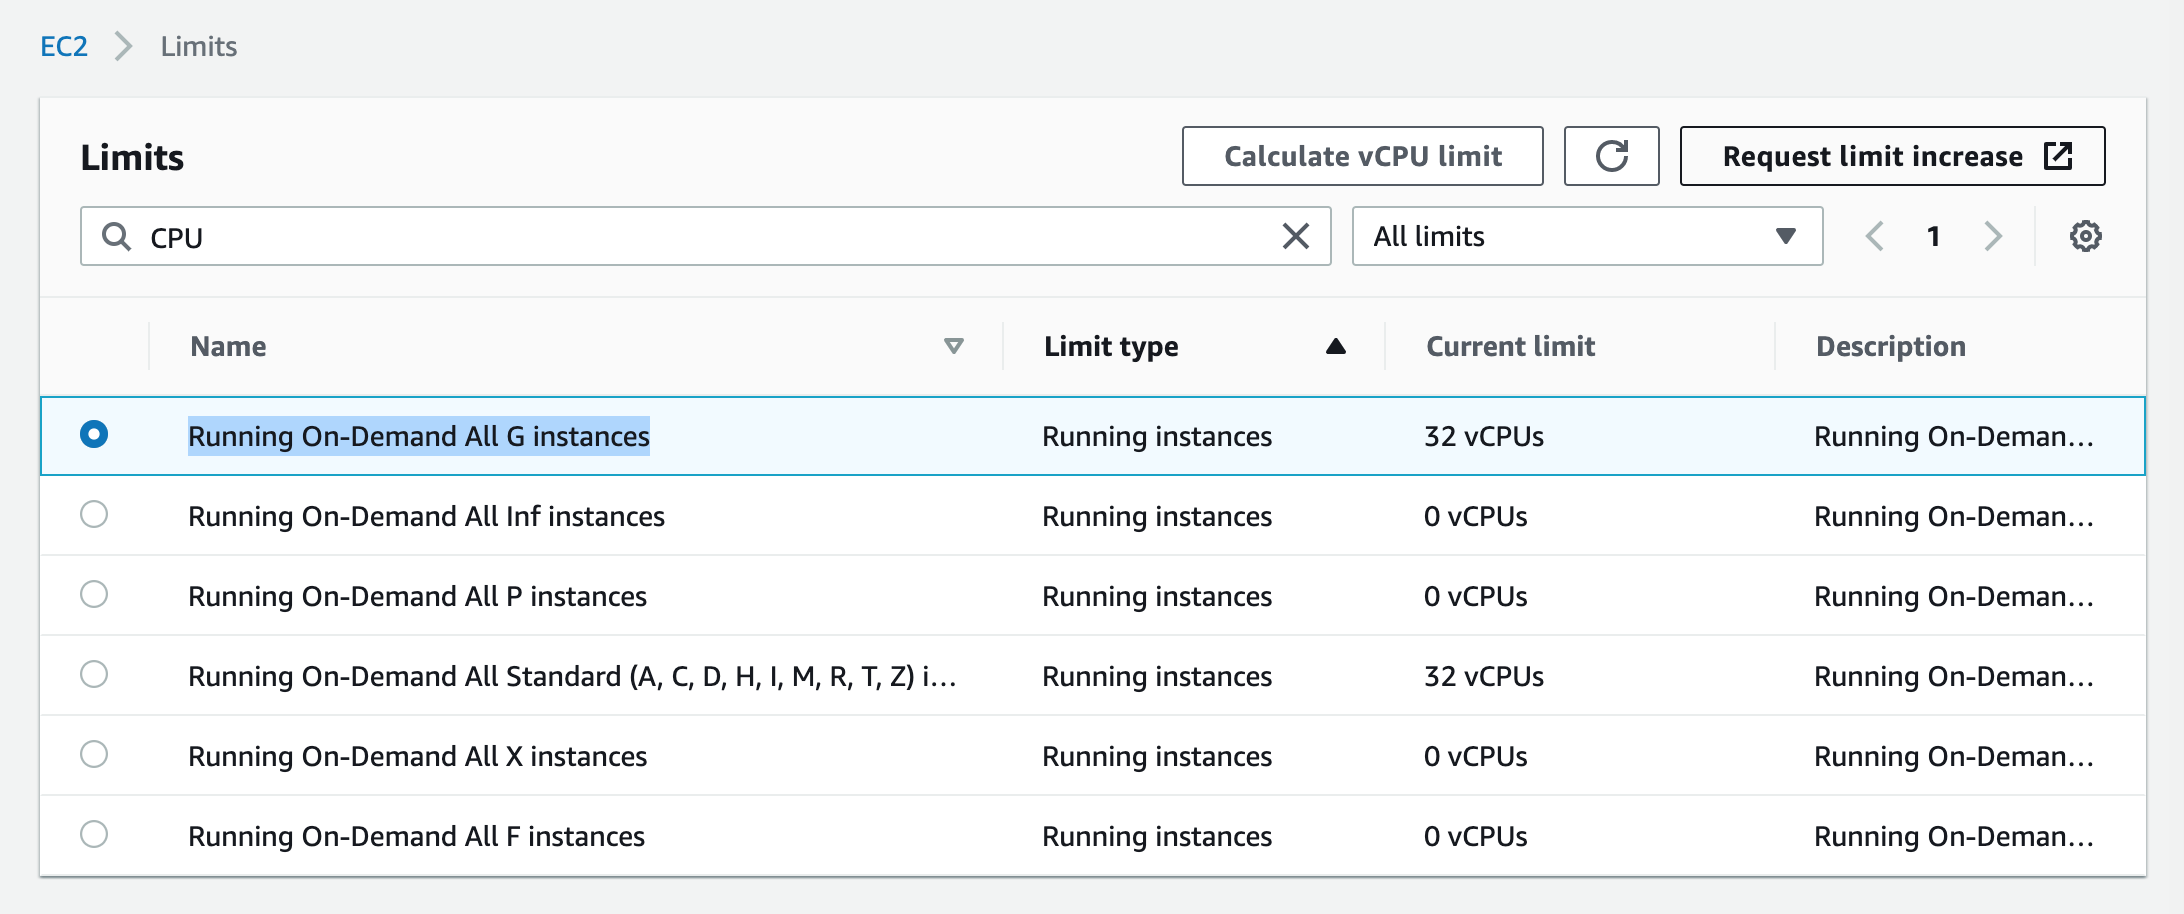
- Click
Request limit increasein the top corner. - A form will open:
- Make sure
EC2 Instancesis selected forLimit type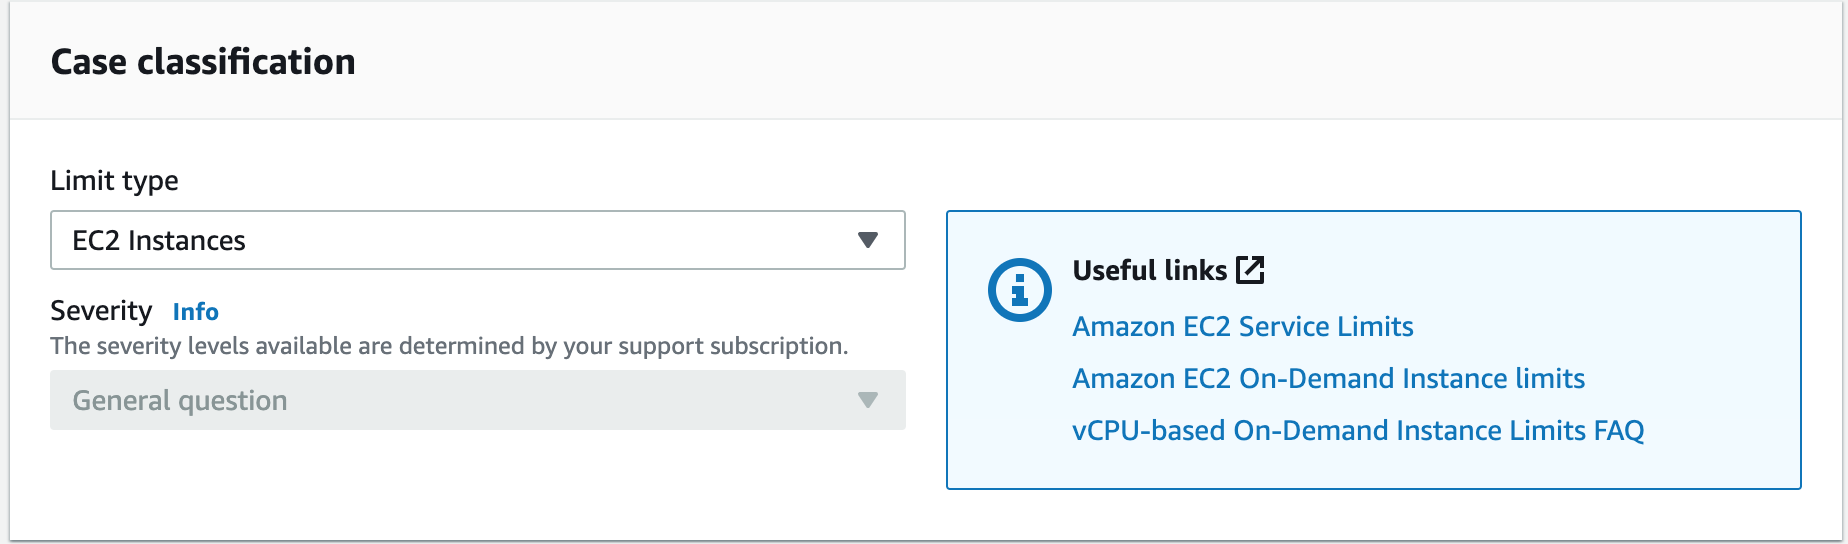
- Select your Region,
All G instancesif you are requesting a machine that starts withg, like theg3.4xlarge. Choose aNew limit valueof16if that is appropriate for your selected machine, like theg3.4xlarge.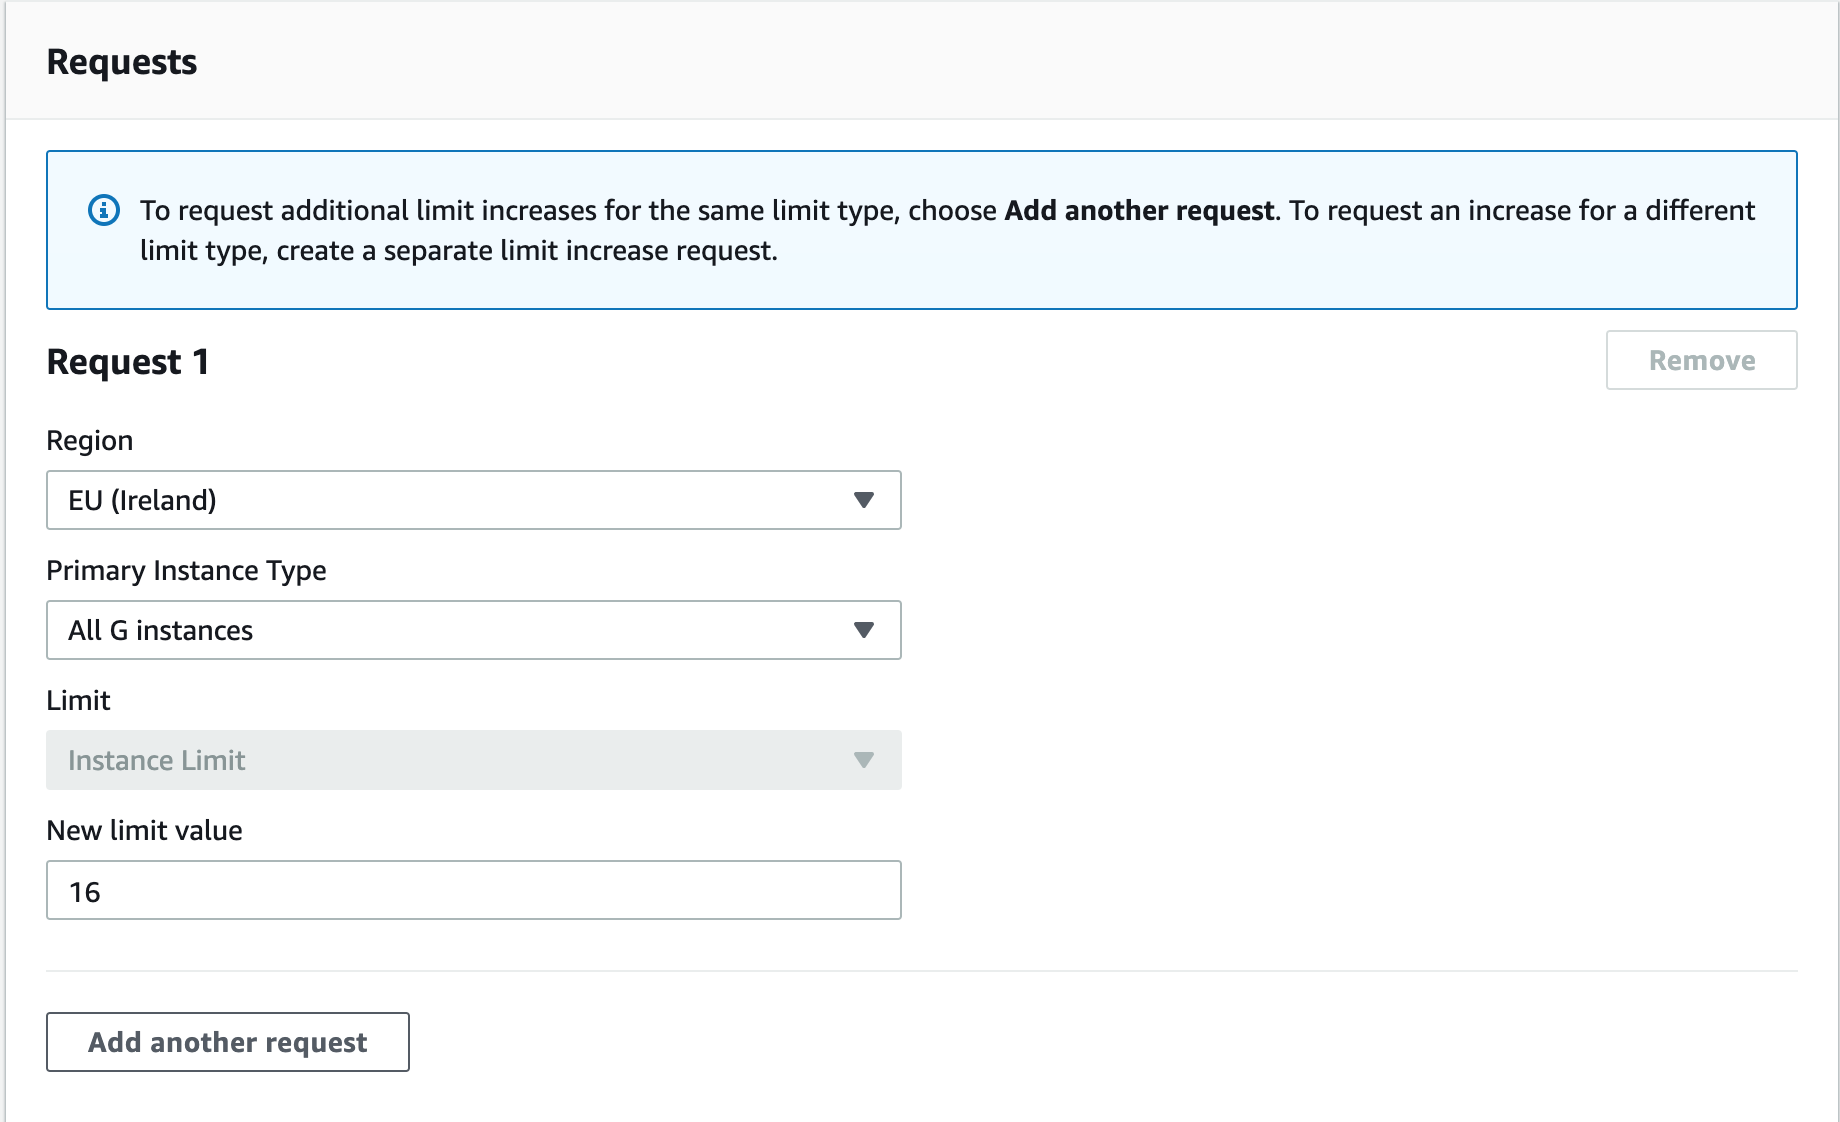
- Finally describe your use case in the
Use case descriptionbox.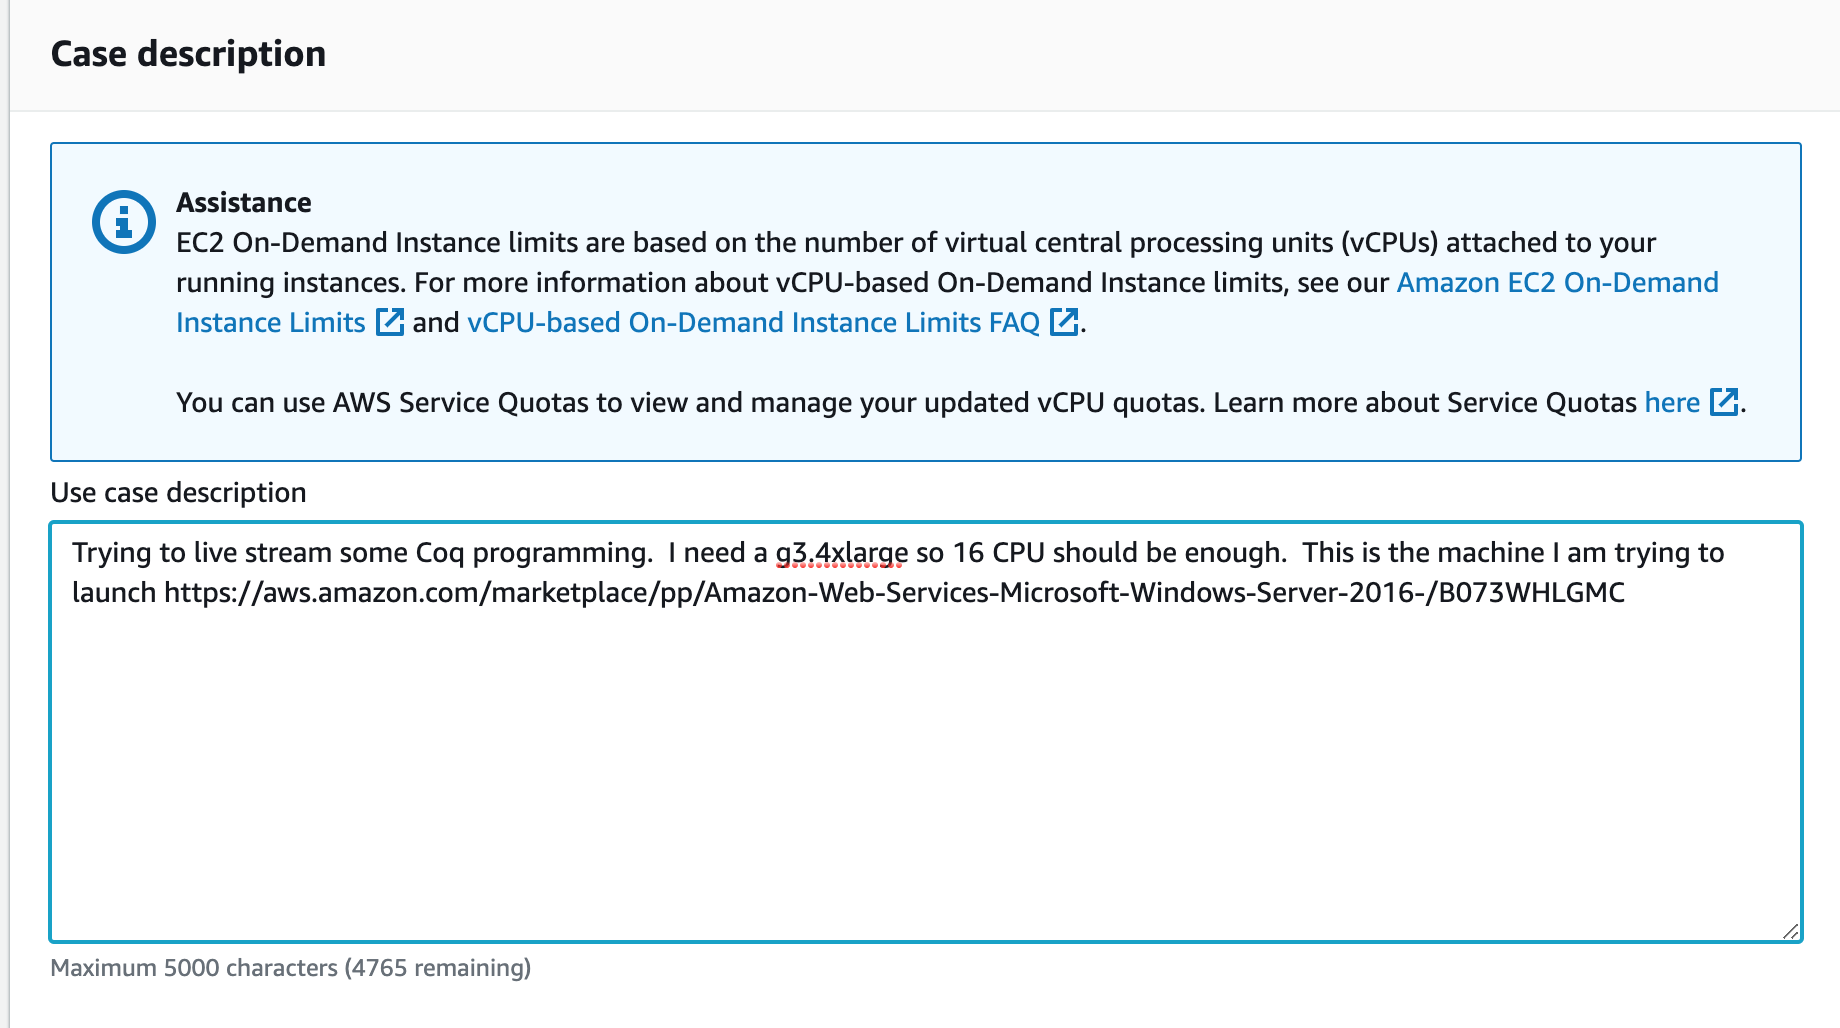
- Make sure
- And now you will have to wait for amazon’s human reviewers to look at the case and decide whether to increase the limits. I waited about 3 days.
- Then you should be able to launch in the instance.
Update security group to enable remote desktop
AWS Windows servers don’t let you log into them using remote desktop by default. You have to create a new security group or update the default security group to allow for RDP traffic.
- go to AWS Console
- go to EC2
- On the left, under
Network & Security, click onSecurity Groups.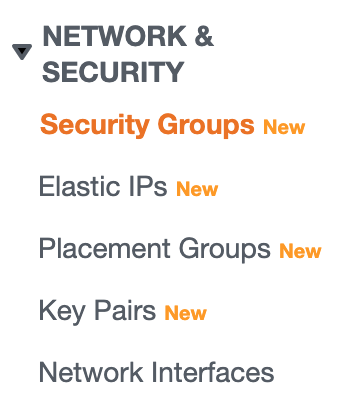
- Now you need to
Create security grouporEdit Inbound Rulesfor an existing group. To edit an existing group, for example thedefaultSecurity group, like I did: Select it, click onActionsand thenEdit Inbound Rules. - Next, add two new rules, using the
Add Rulebutton:
Type: RDP, Source: 0.0.0.0/0andType: RDP, Source: ::/0 - Finally click
Save rules. Now you should be able to use remote desktop to log into your server.
Launch and log into server using Remote Desktop
If AWS has approved your CPU limit increase, you can move onto this step.
- If you are on a mac, like me, you will need to install remote desktop.
- Now is the time to launch your instance
Microsoft Windows Server 2016 with NVIDIA GRID Driver
- click on
Continue to Subscribe. This doesn’t cost anything for this specific instance, since it is an instance marketed by AWS themselves, but other instances on AWS Marketplace, might cost a subscription fee. - click on
Continue to Configuration - pick your specific region, we chose
EU (Ireland). - check that the
Software Pricingis$0/hrif you haven’t chosen a different machine.Infrastructure Pricingshould have a real cost associated with it. - click on
Continue to Launch
- click on
- go to EC2
- click on Instances on the left side menu.
- Now the machine might already be started, or initializing, but if is not, then right click on the instance, select
Instance Stateand thenStart.
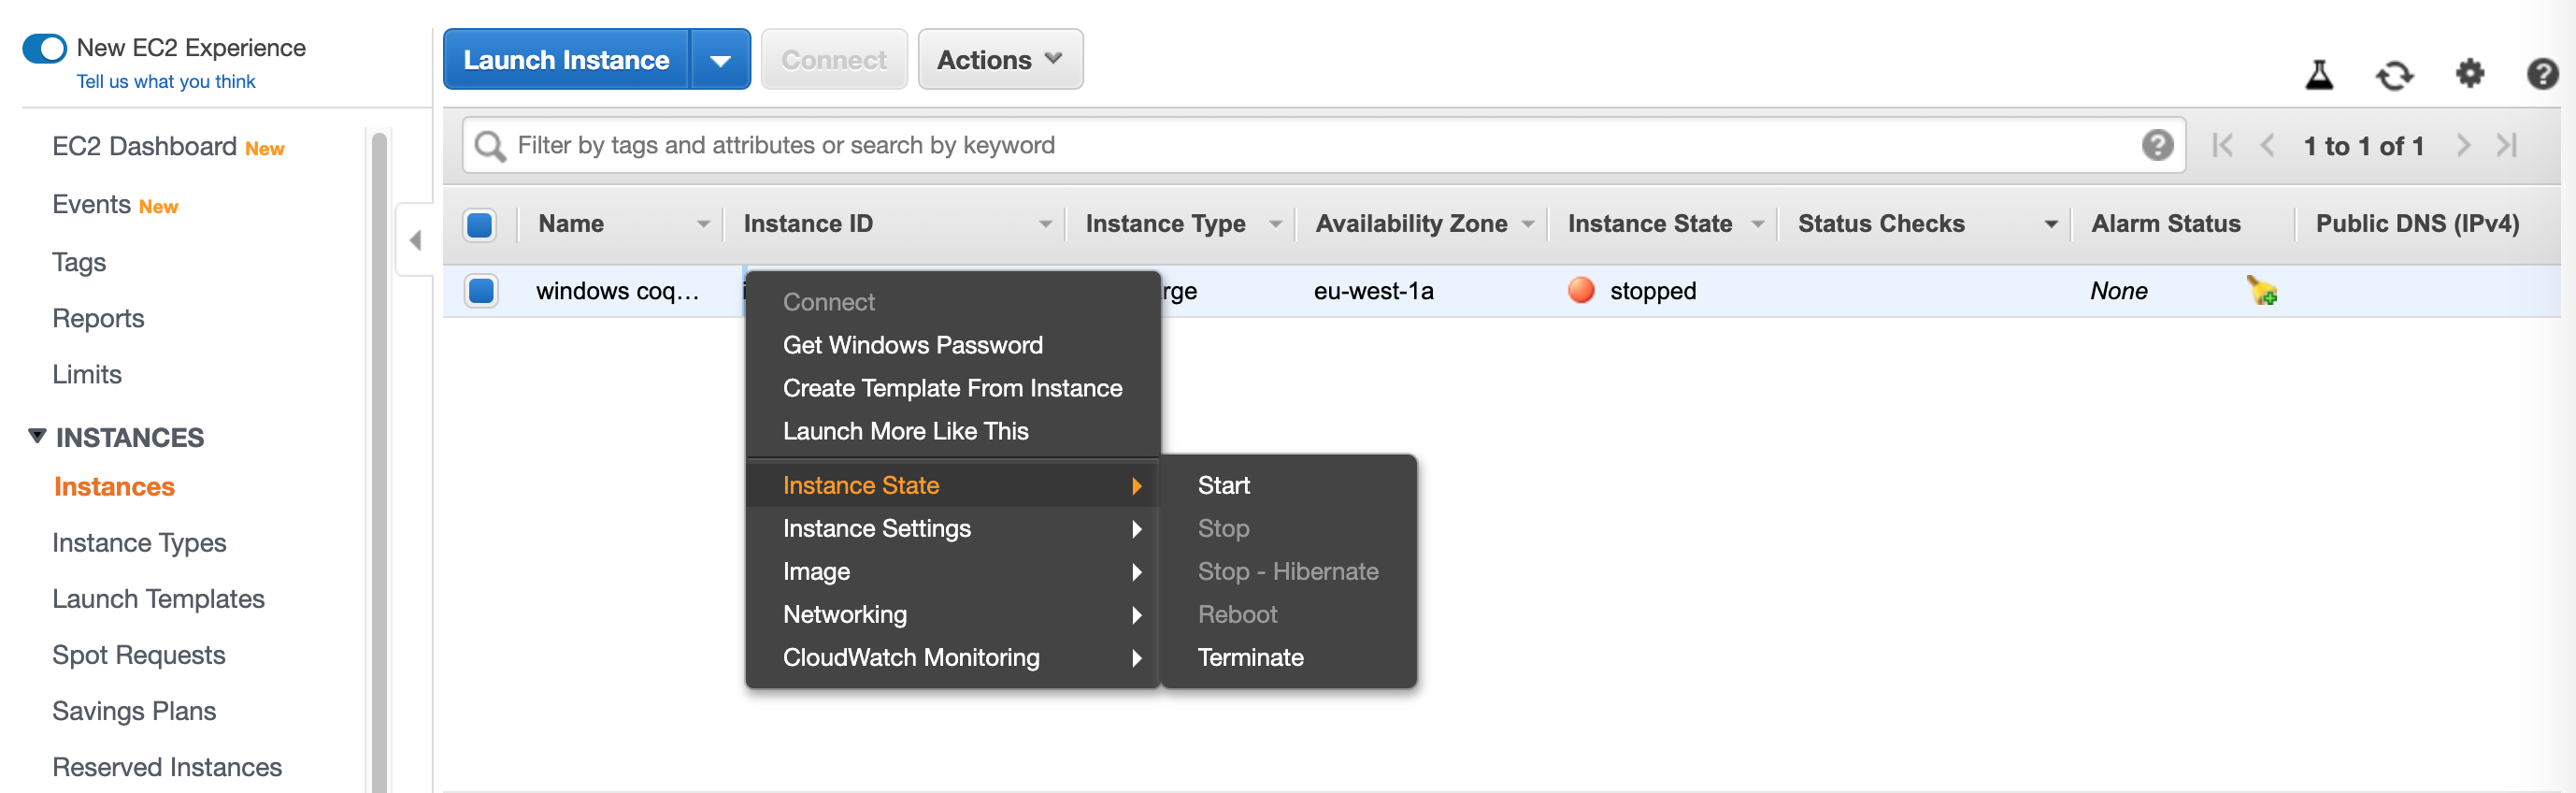
- Wait for
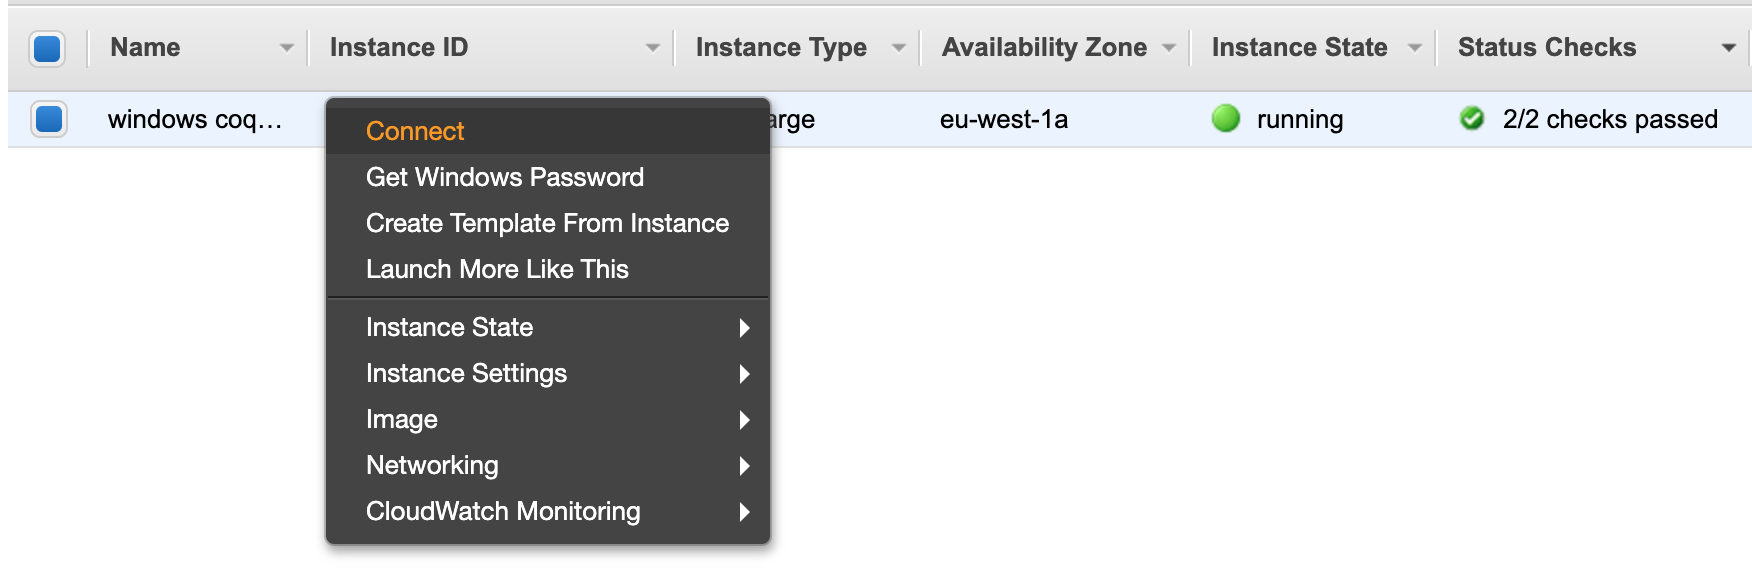
Status Checksto turn fromInitializingto2/2 checks passed. - Right click on your machine and click
Connect
- Click on
Download Remote Desktop File
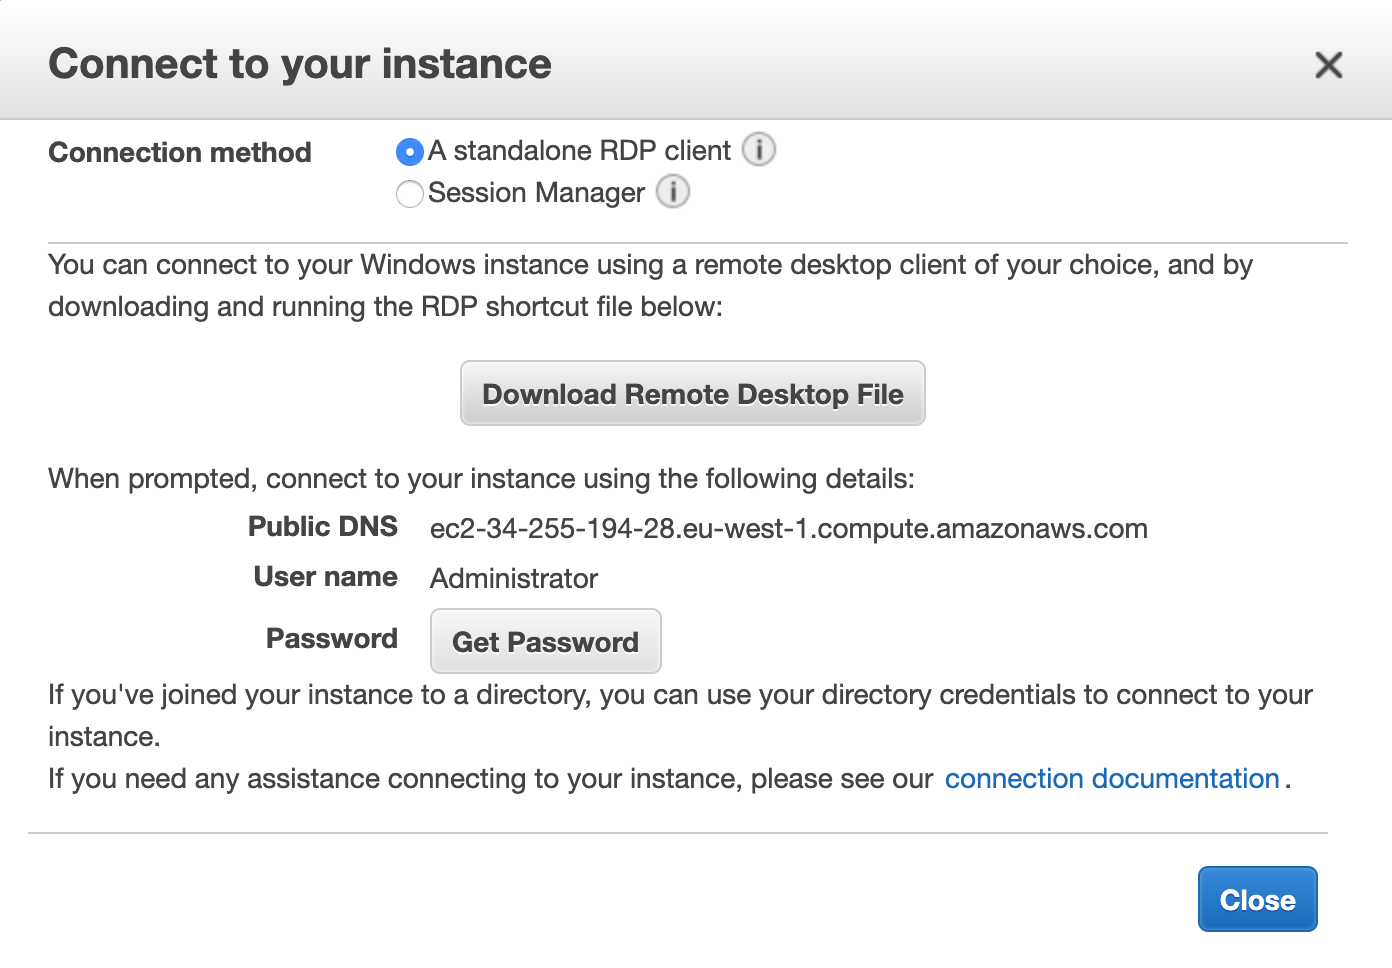
- You will also need to click
Get Password, but I will leave those details up to you. - Now open the downloaded remote desktop file, using remote desktop.
- You will need to paste in the password you got from
Get Password. - Well done! You can now remotely control the AWS windows server, from your home computer, using remote desktop.
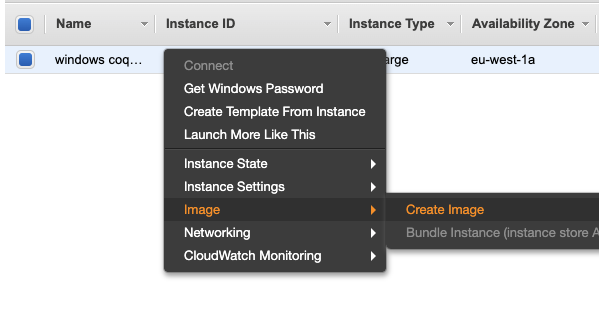
- Before you possibly
stopyour machine, remember to create an image in the AWS E2 Instances, otherwise you could lose your work?
Update Internet Explorer security
This first problem you will encounter on your windows server, is Internet Explorer has been severely limited, via a security setting. Basically, you won’t even be able to download another browser. Let’s fix that.
On your windows server, via Remote Desktop:
Open
Server Manager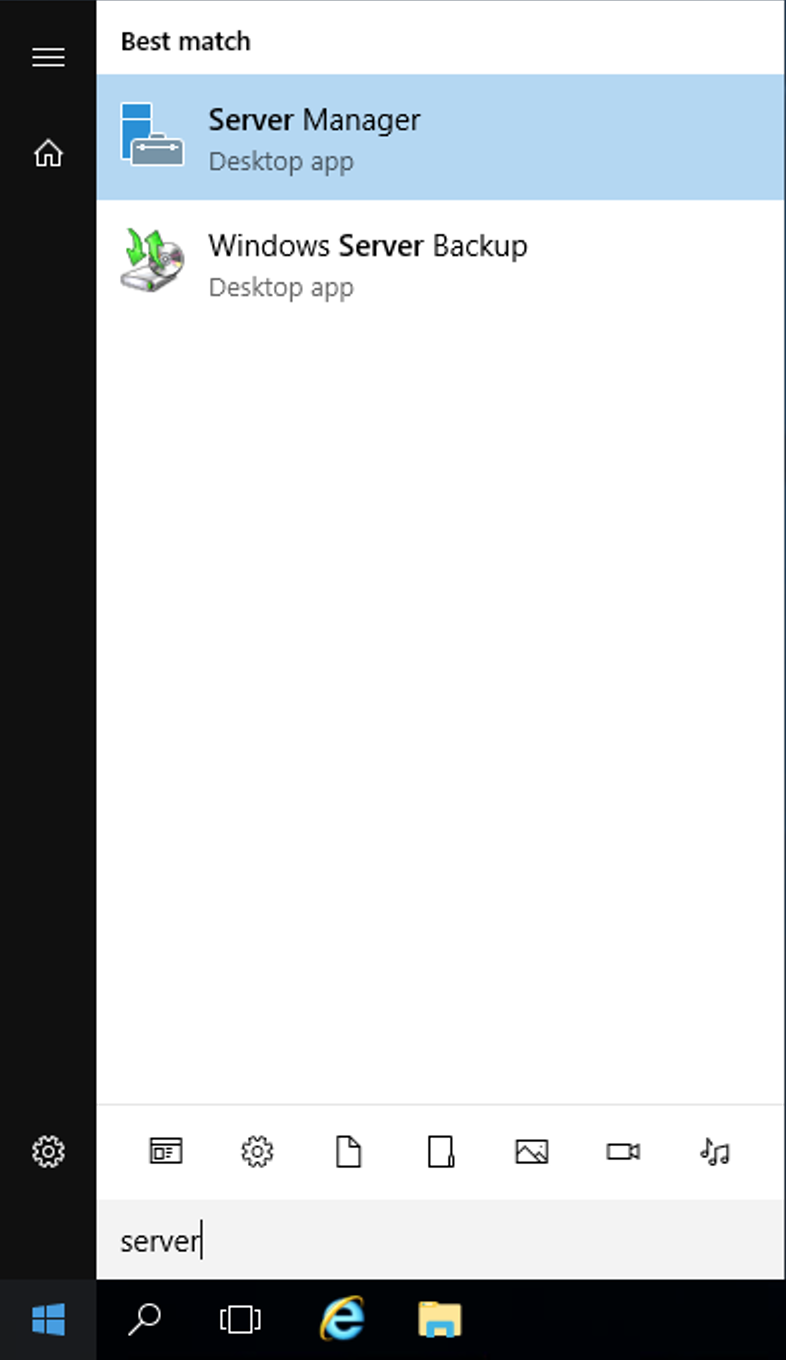
In the left panel, Select
Local ServerIn the top panel with heading
Properties, in the right middle of that panel, you will seeIE Enhanced Security Configuration. Mine already, saysOff, but yours will sayOn.

- Click on
Onand selectOfffor both users and Administrator.
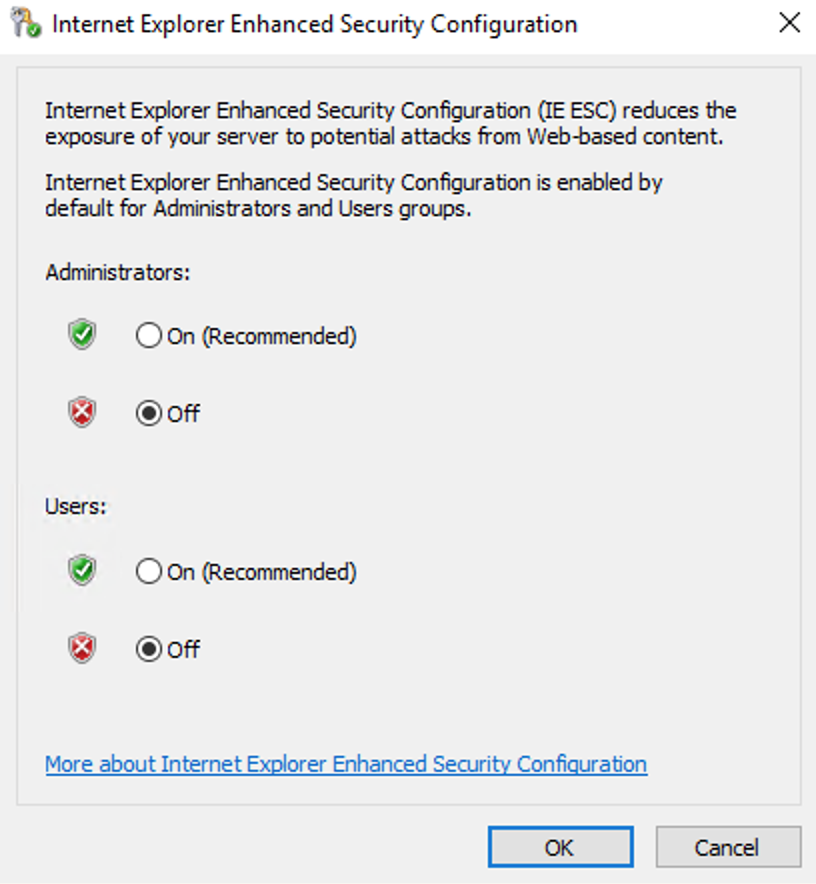
- Click
Ok. - Close
Server Manager - Open Internet Explorer, it should now show that
Caution: Internet Explorer Enhanced Security Configuration is not enabled.
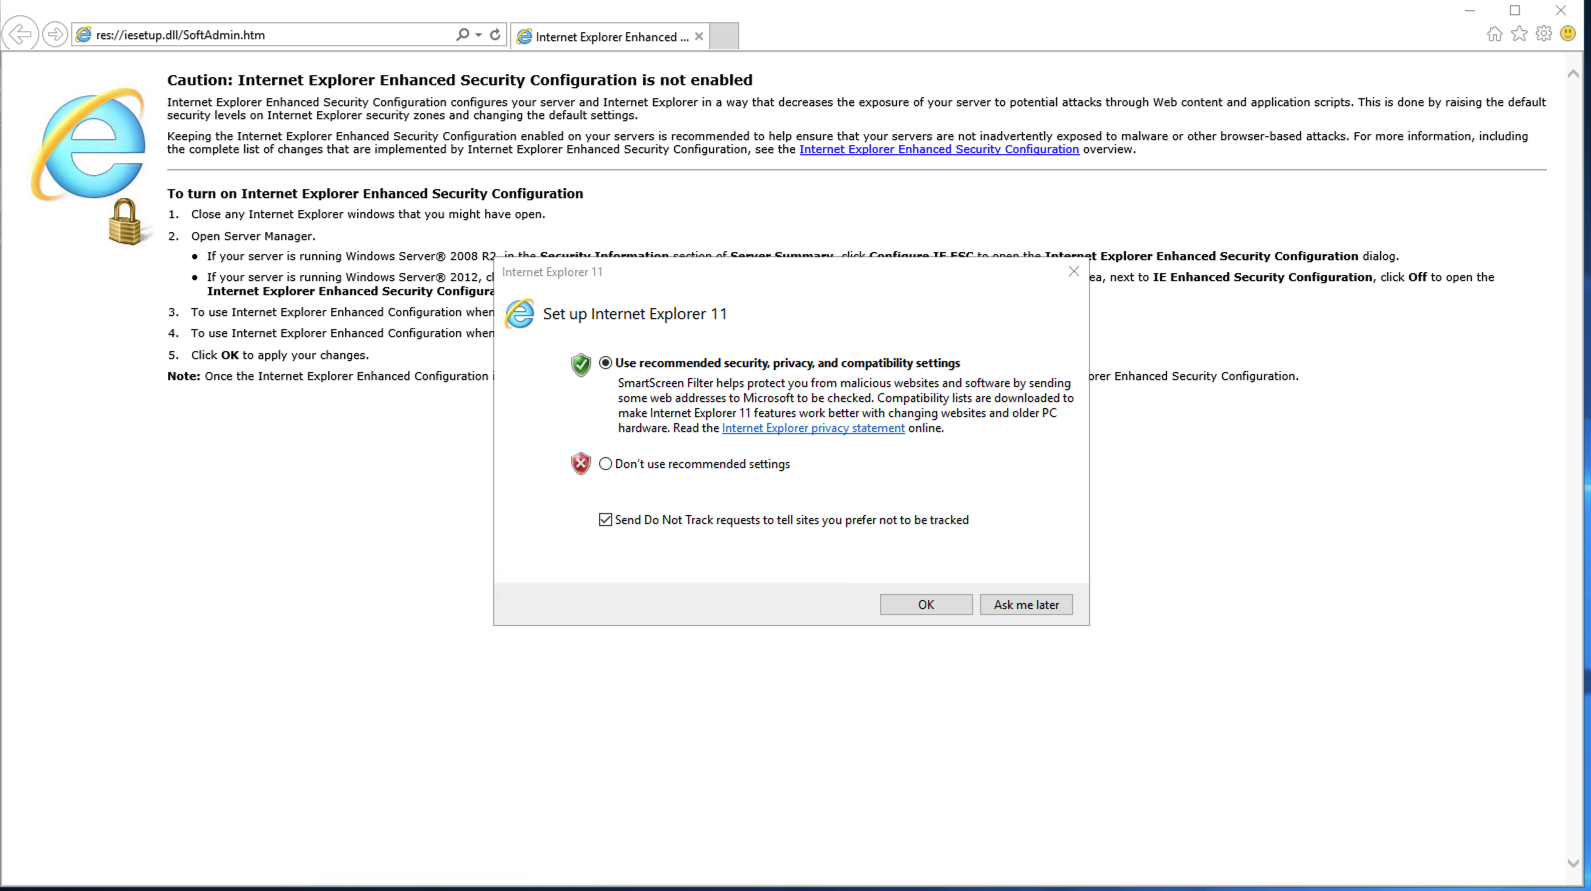
- Download and install your browser of choice.
Install and setup Teamviewer
Why do we need Teamviewer, when Remote Desktop is working so well? It all comes down to sound. A server doesn’t have a sound card, but we want to stream the sound from our video call to Twitch. We will need to install a virtual sound card and this doesn’t play nicely with Remote Desktop.
VNC is another option, but we opted for Teamviewer, because we will need cloud connect for a user friendly experience and this is free for personal use on Teamviewer, where I found with VNC servers that it looked like I needed to pay. I could be wrong. In the end Teamviewer was more user friendly for me and solved the sound problem.
- Install Teamviewer on your mac and windows server.
- Once installed, on the windows server, Sign in or create a Teamviewer account and sign in.
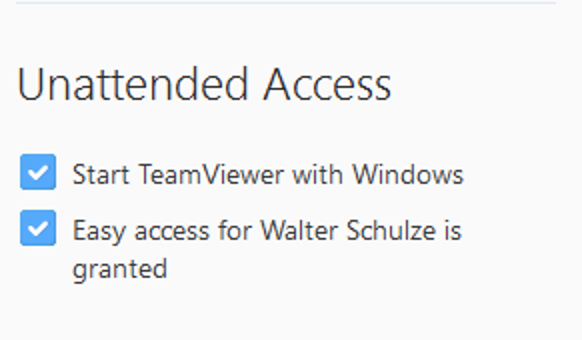
- On the windows server, Tick
Start Teamviewer with WindowsandEasy access for ... is granted.
- On your mac, sign into your Teamviewer account.
- You should now see the machine under
Computer & Contacts. - Double Click on the machine to connect.
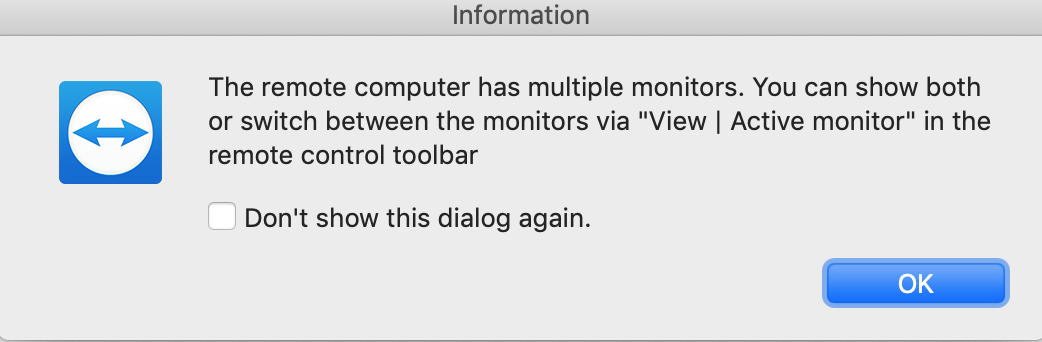
- You should get a notification about
multiple monitors. This server has two virtual monitors, which is going to be very useful for streaming. ClickOk
- You should now see a locked screen, that requires
Ctrl+Alt+Deleteto unlock. Click onActionsin the top menu bar and then selectCtrl+Alt+Delete. - You should now be able to log into your Administrator account. You might have a problem here, which is copy and paste is not working, at least it didn’t work for me.
Click on
Actionsagain in the top menu bar and then selectSend key combinations. Try again. You might still have a problem, just like me. You are not alone, but it did eventually start working. Unfortunately, I never got to understand why.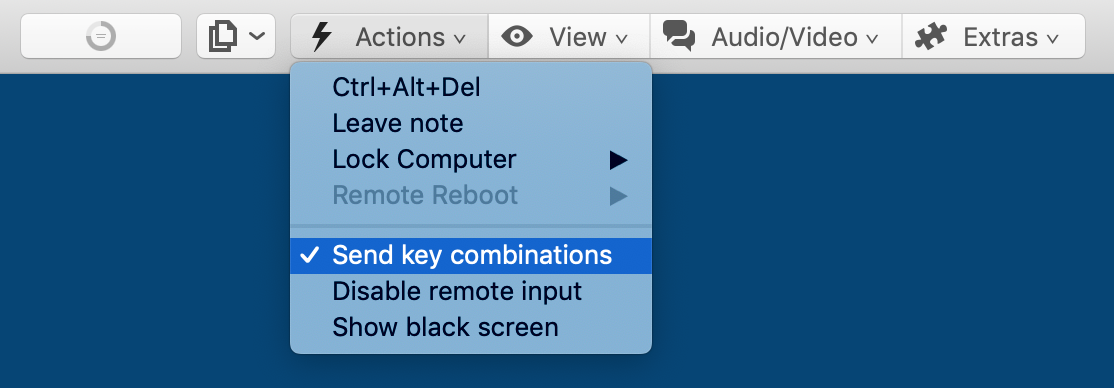
Now is as good a time as any to create a user account. If you are unable to log into Teamviewer, yet. Go to remote desktop and create a user account, with a password that you can remember and type without copying and pasting. You can keep your Administrator account secure and only ever need to use it with Remote Desktop. Only your user account will need to work with Teamviewer and might need a password that you can actually remember and type out.
Now you can use Teamviewer to log into your user account.
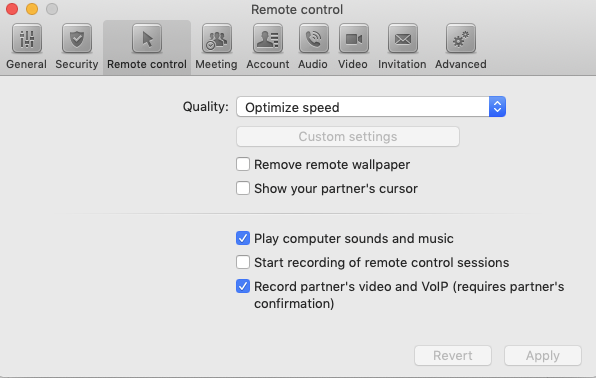
One more thing I would encourage you to Configure is to Optimize for speed over quality of image. If you are planning to code, then typing is a big part of that and typing feedback can be very important. Go to Teamviewer’s
Preferences. Click onRemote Controland from theQualitydropdown, selectOptimize speed.
Install virtual sound card
On the windows server:
- Download VB-Audio Software’s VB-Cable. We don’t need the VB-Cable A+B, etc. We only need the
VBCABLE_Driver_Pack43.zip. - Unzip and run
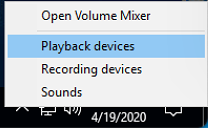
VBCABLE_Setup_x64. - In Teamviewer, go to your sound card settings, by right clicking in the bottom right corner on the little speaker and selecting
Playback devices.
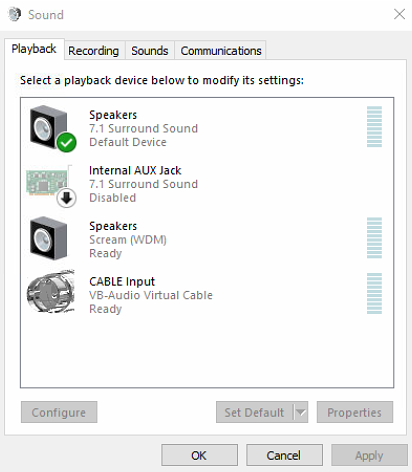
- Under
Playbackyou should seeCable InputbyVB-Audio Virtual Cable. Please ignore the other playback devices, I tried several routes before realizing remote desktop was incompatible with virtual sound cards and I haven’t taken the time to clean up the other virtual sound cards I ended up not using or even evaluating.
- The virtual sound card is now installed, we are going to use it to thread the zoom output sound into OBS input sound and stream this to Twitch.
Install and setup Zoom
I chose Zoom, because:
- Zoom allows screen sharing and doesn’t turn off your webcam to do so.
- Zoom’s window in which participants are viewed is the prettiest to put in a corner of your screen and has
always on topenabled automatically.
I might reconsider this choice in future, since Zoom calls over 40 minutes are not free and removing this from the setup would moderately reduce the overall cost of this setup.
Whichever Video Call program you choose, it is important to setup the sound output. Here is how I did it for Zoom, but you should easily be able to reproduce this with any Video Calling program.
- Install Zoom on your windows server and create a new account. You are going to need two accounts for Zoom. One for the windows server and one for your home computer. Only the account that will be hosting the meetings will need to be a paid account, if you are planning on pair programming longer than 40 minutes at a time, like me.
- Go to Zoom settings and then
Audio. Set the Speaker toCABLE Input (VB-Audio Virtual Cable), the Microphone doesn’t matter as we won’t be using the server’s microphone.
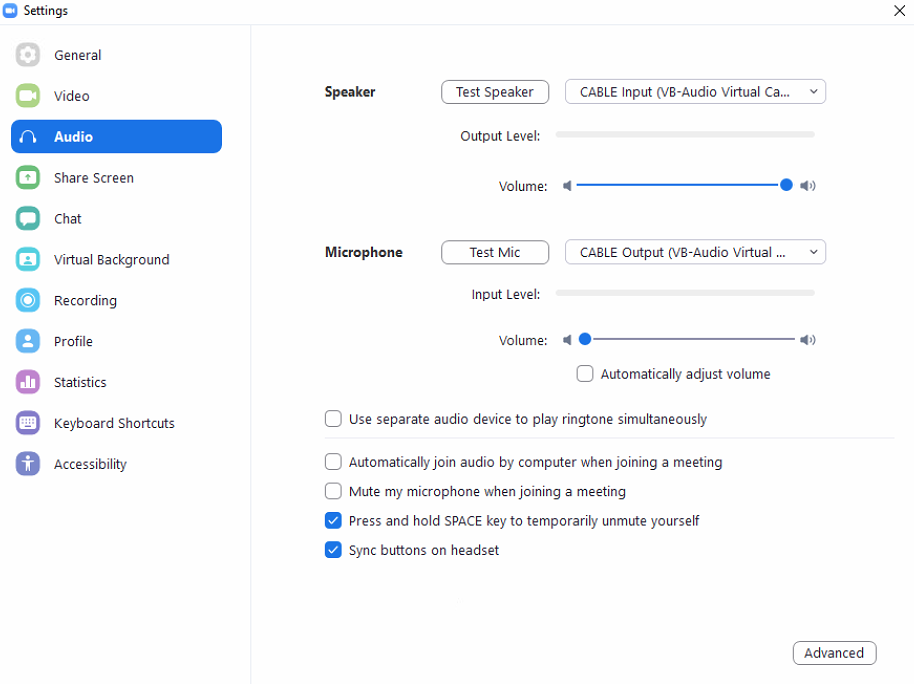
Now Zoom will send its output, which should include everyone on the call’s audio to CABLE Input.., which we are going to capture using OBS.
Install and setup OBS
OBS Studio is used to Stream to Twitch, Youtube, etc. Now is probably a good time to skim through a better blog to learn a bit more about OBS and how to use it. There are also many videos that explains how to setup OBS. We will not be going into that. We will only be touching on the specific OBS configuration for this setup, namely how to route the audio and how to share our screen using the multiple monitors of this AWS Server.
- Log into your windows server as Administrator. Installing OBS requires being logged in as Administrator, so I installed it using Remote Desktop.
- Download and install OBS Studio and setup connection to Twitch. There should be step by step instructions for doing so.
- After installation, we can log back into our user, using Teamviewer.
- Go to
Viewin the top menu bar, underActive monitor, clickShow all monitors.
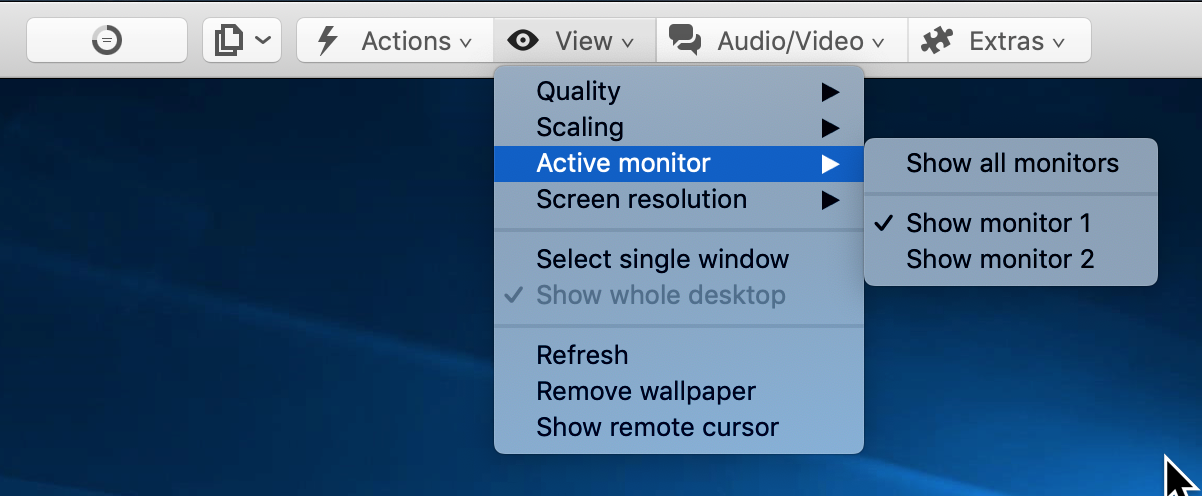
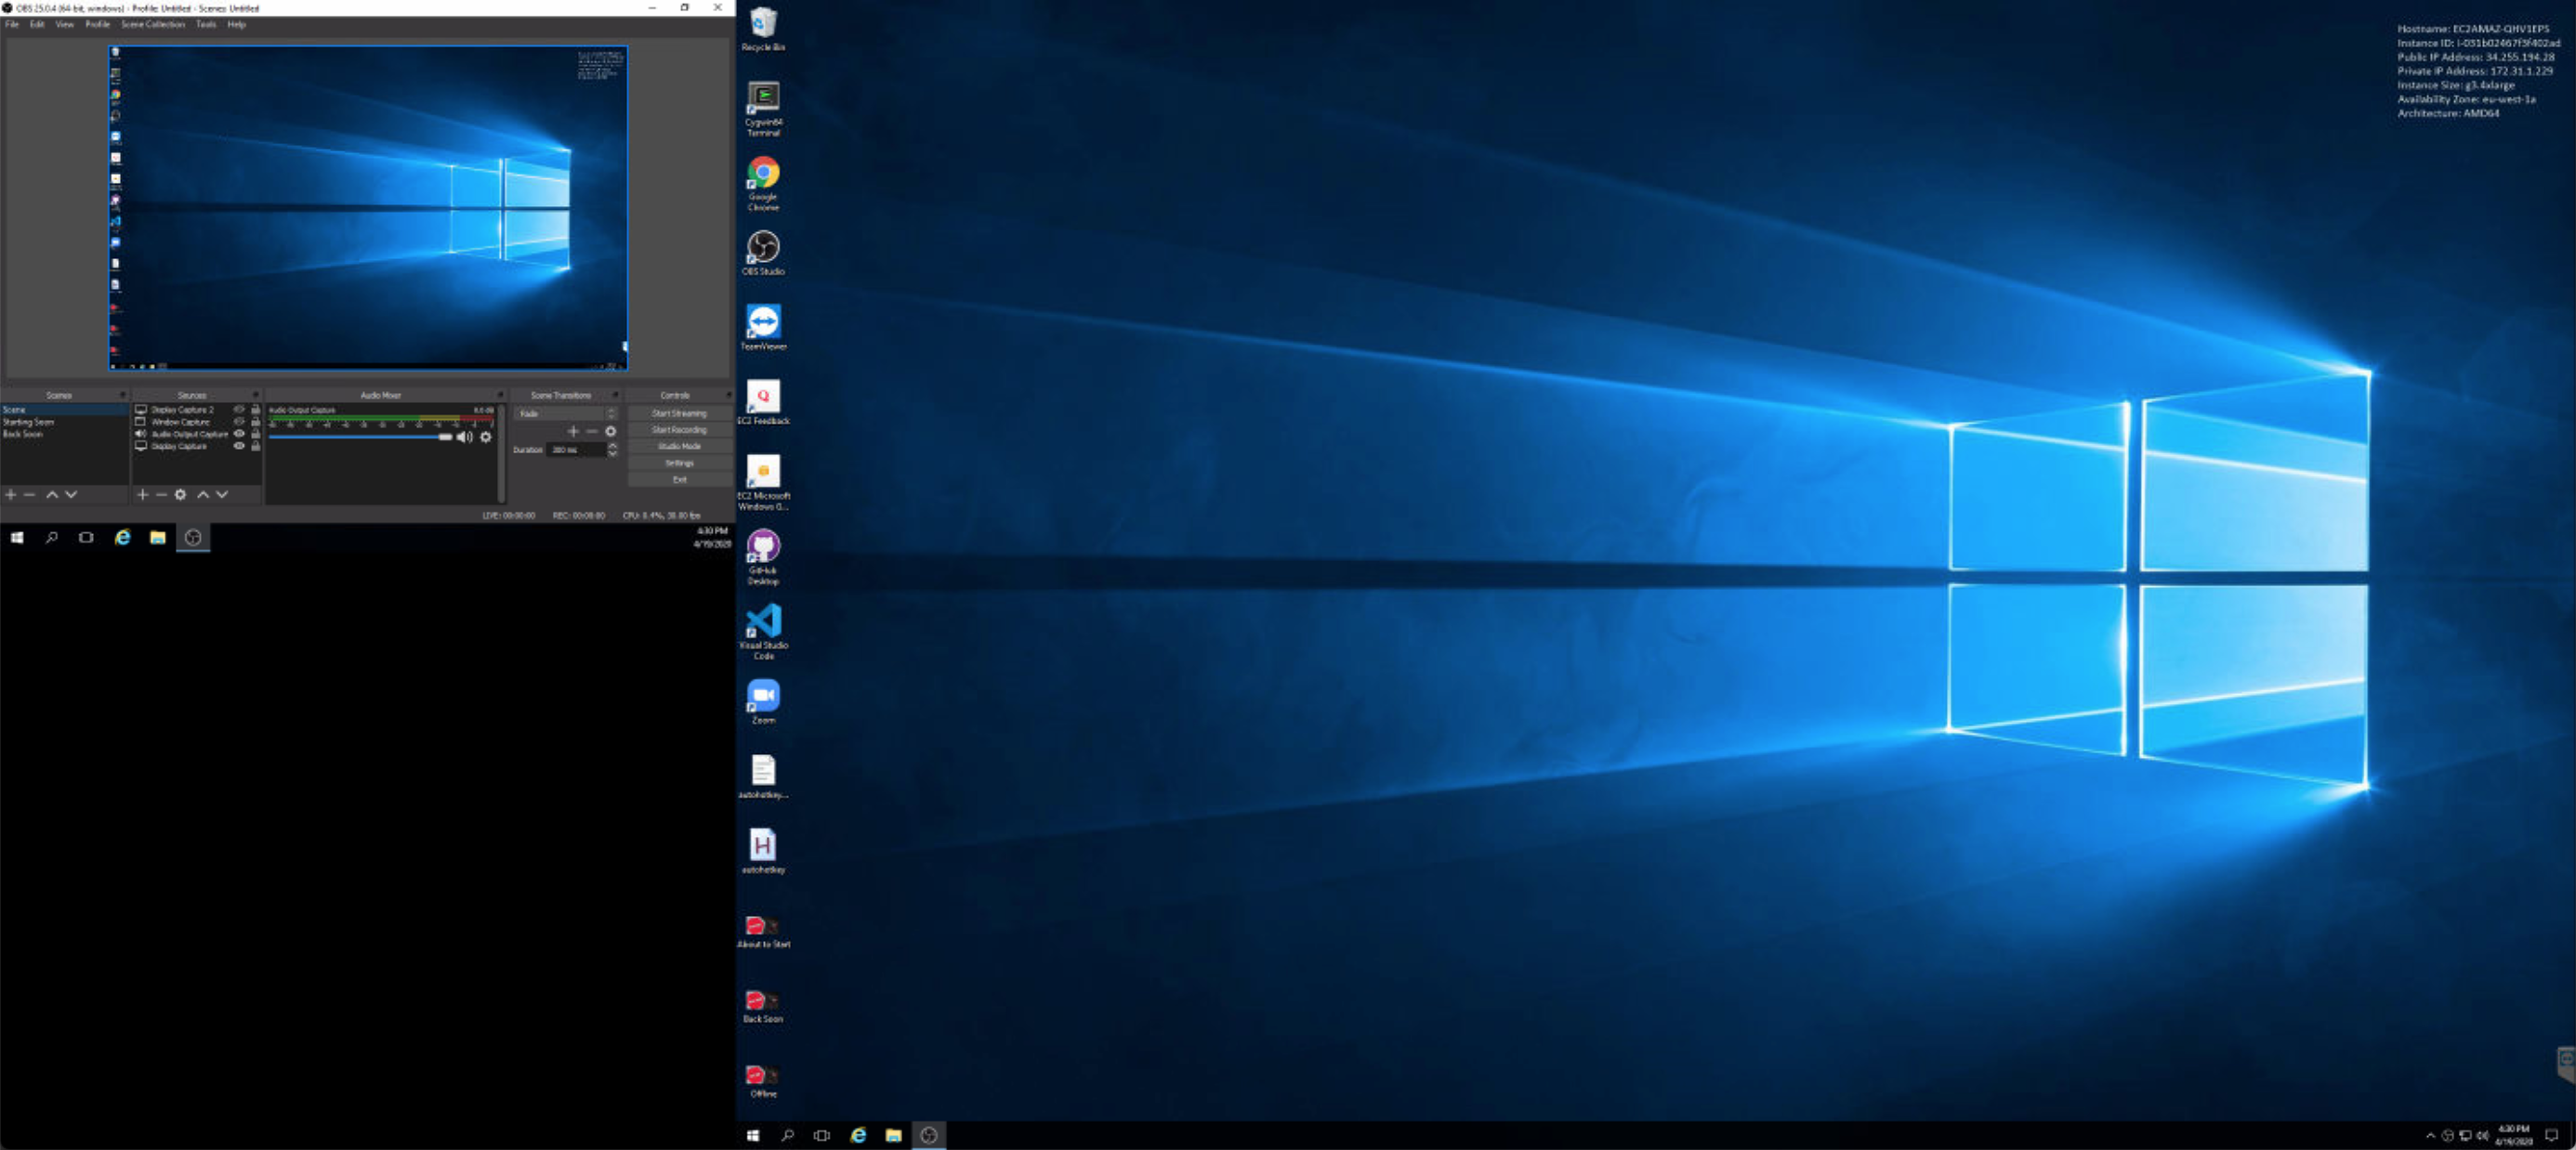
- Open
OBS Studioand drag it to the smaller second monitor. Your OBS will be less interesting than mine, since mine is already setup. OBS will be running on the smallmonitor 2and we will be usingmonitor 1for everything we want to stream to Twitch.
- We can capture the sound from zoom that we have routed to
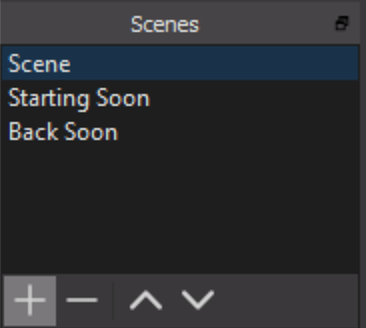
CABLE Input (VB-Audio Virtual Cable)in OBS, by first creating a Scene. Click the+button in theScenepanel.
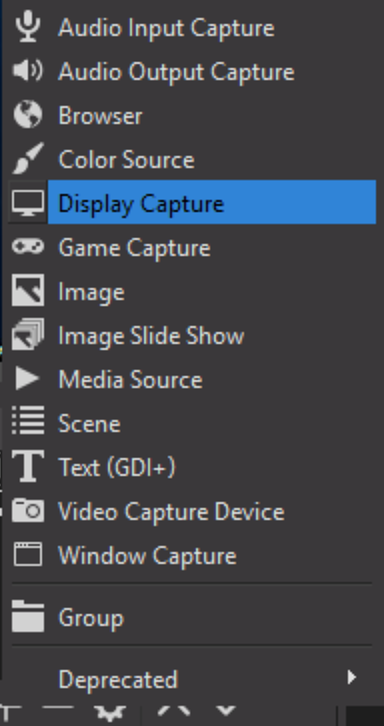
- Select our new scene and click the
+button underSourcesand selectAudio Output Capture.

- Select
Create New, type a name and clickOK. - Select the
Devicefrom the dropdown:CABLE Input (VB-Audio Virtual Cable)and clickOK.

- You should now be able to test the sound, by creating a Zoom call between your home computer and the windows server and see the green bar in the Audio Mixer move, when you talk.

- We can capture
monitor 1, by adding another Source. Click the+underSourcesand selectDisplay Capture.
- Select
Create New, type a name and clickOK. - Select the
Devicefrom the drop downDisplay 1...and clickOK.

- You can now test the sound and display by clicking the
Start Recordingbutton in OBS, creating a zoom call and watching and listening to yourself speak, by playing the recorded file.
Install and setup IDE
This setup is specific to VSCode and Coq, but you can install any IDE for any programming language you want.
- Install VSCode
- Install your programming language, in our case Coq
- Install your VSCode plugin, in our case VSCoq and make sure it points to your Coq installation.
- Turn off some suggestions. Suggestions are great for auto complete, but if they happen when you simply type space they can be disruptive and possibly over work the language server. I found turning this one setting off
Editor > Suggest: Show Propertiesin vscode, results in hints from VSCoq to only happen after I have typed some letters.

Remap keys
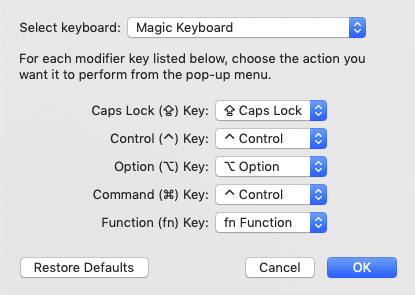
Controlling a windows machine from a mac, means that several of your usual shortcuts no longer work.
Mac uses the Cmd key, where windows uses Ctrl key a lot. This is a simple fix on your mac.
Go into your keyboard settings, select Modifier Keys and remap Cmd to Ctrl.
For the rest, I use Autohotkey to remap my most popular mac shortcuts to windows shortcuts.
- Log in as Administrator.
- Install AutoHotkey on your windows server.
Create a script file: mac.ahk
;Autohotkey script

;Ctrl+Shift+Left => Shift+Home
^+Left::Send +{Home}
;Ctrl+ShiftRight => Shift+End
^+Right::Send +{End}

^w::Send ^{F4}
^q::Send !{F4}
This script has to run as Administrator.
Right click on the file and choose Run as Administrator, when you log in as your normal user.
I needed to have Teamviewer’s Send key combinations enabled, others have reported the opposite so play around with this.
Choose a method of collaboration
If you want to do collaborative editing, instead of just having your pair programmers, be backseat coders. There are several options:
- Teamviewer allows for multiple logins and that works great, since now your collaborators have full control. You need to coordinate who is using the keyboard. Also less obviously you are also sharing a copy and paste buffer. So if one of you is doing something on their own computer and copies something, the other person can paste this into teamviewer onto your public stream, so be careful about copying passwords, etc.
- Alternatively you can install Live Share, but we couldn’t get this working with Coq’s Proof View. I hope we are wrong, because this would solve a lot of problems.
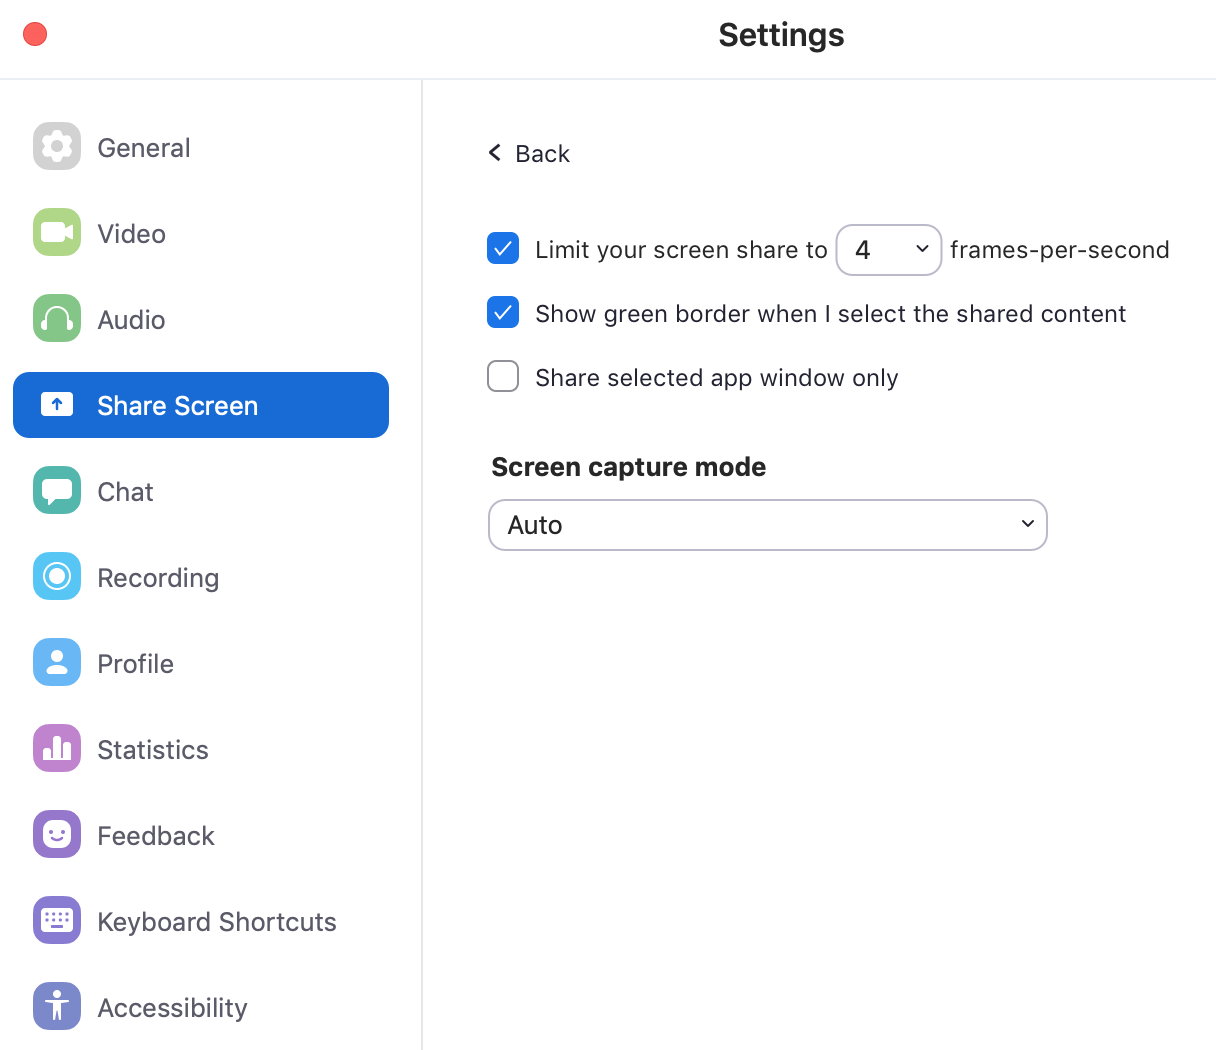
- Screen share via Zoom allows multiple collaborators to switch between who is driving. Yes technically the server doesn’t have to be the one that is sharing its screen with your collaborators. Your collaborators can actually share their local screen and this shared screen can then be captured with OBS on the AWS server and streamed to Twitch. In this case collaborators with limited CPU, might want to limit the amount of frames they are sharing.
- Go to Zoom Settings
- Click
Share Screen - Click the
Advancedbutton in the lower right hand corner. - Check the Limit your screen share box
- Select 4 frames-per-second.
Stream
Finally you are ready to stream.
You will probably want to create pictures that you can use to display when you are:
- Offline
- Starting Soon
- Taking a Break and possibly
- Entering a password

Come check out the resulting stream: https://www.twitch.tv/awalterschulze
Thank you
- Ayman Osman for the idea of using AWS, tutoring me in how to use AWS and also encouraging me when I was about to give up.
- Max Heiber for the initial idea to stream Coq programming.
- Paul Cadman for testing and searching and finding a way to limit the number of frames in Zoom, when my CPU was still struggling.
- Niels uit de Bos for testing the stream.